[ad_1]
If you’re looking for a single tool to help monitor and access your servers and containers, ServerCat might be just the ticket.

ServerCat is a macOS app that makes it easy to monitor and access your Linux servers, and it even offers limited management of your Docker containers. The app is simple to use and has both a free and paid version. The free version only allows you to check your server and Docker statuses, whereas the paid version adds SSH access, batch execution, snippets and iCloud Sync. The Docker Batch Execution Management feature alone is worth the price of entry.
SEE: Hiring kit: Back-end Developer (TechRepublic Premium)
ServerCat is only available for macOS and iOS and does not install any applications on your servers. To function, ServerCat uses SSH to read the /proc file system on Linux to get the status of a system. It’s a simple and elegant solution that makes monitoring and managing any number of remote Linux servers a breeze.
What you’ll need to use ServerCat
The only things you’ll need to install and use ServerCat are a running instance of macOS and at least one Linux server to monitor. That’s it: Let’s get to the installation.
How to install ServerCat
Log in to your macOS machine and open the App store. Search for ServerCat and click Get associated with the entry.
Next, click Install and, when prompted, type the password associated with your Apple App Store account. The installation should finish without issue.
How to add a host to ServerCat
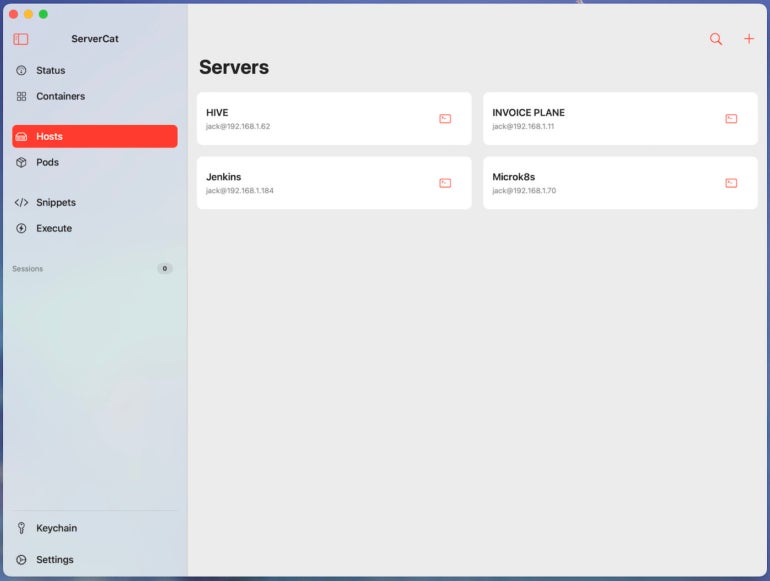
Click on the macOS Launchpad and search for ServerCat. Click the launcher to open the app. From the app’s main window, click Hosts (Figure A).
Figure A
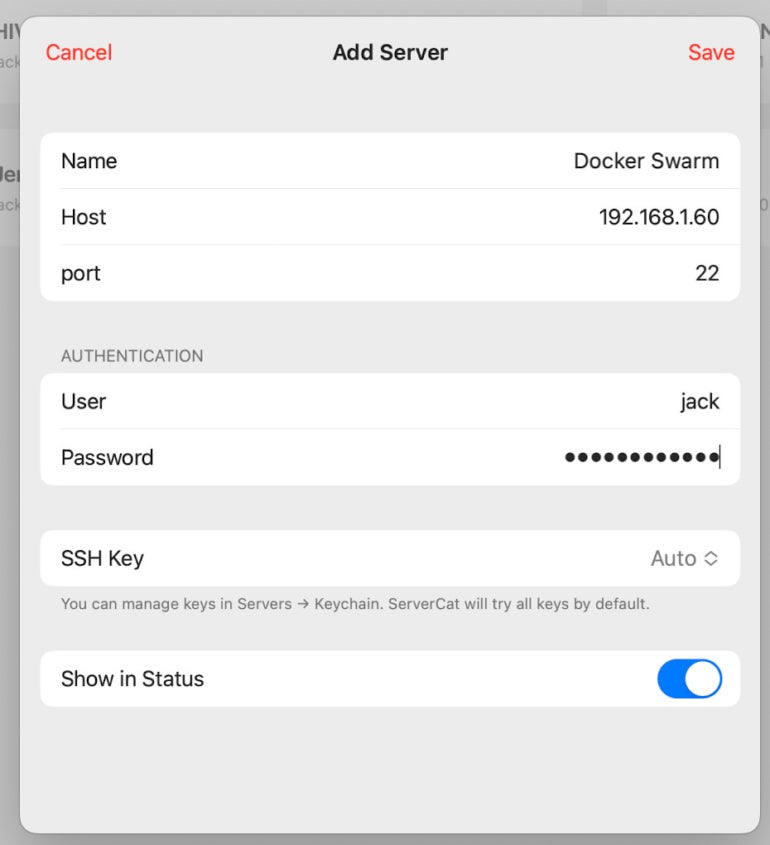
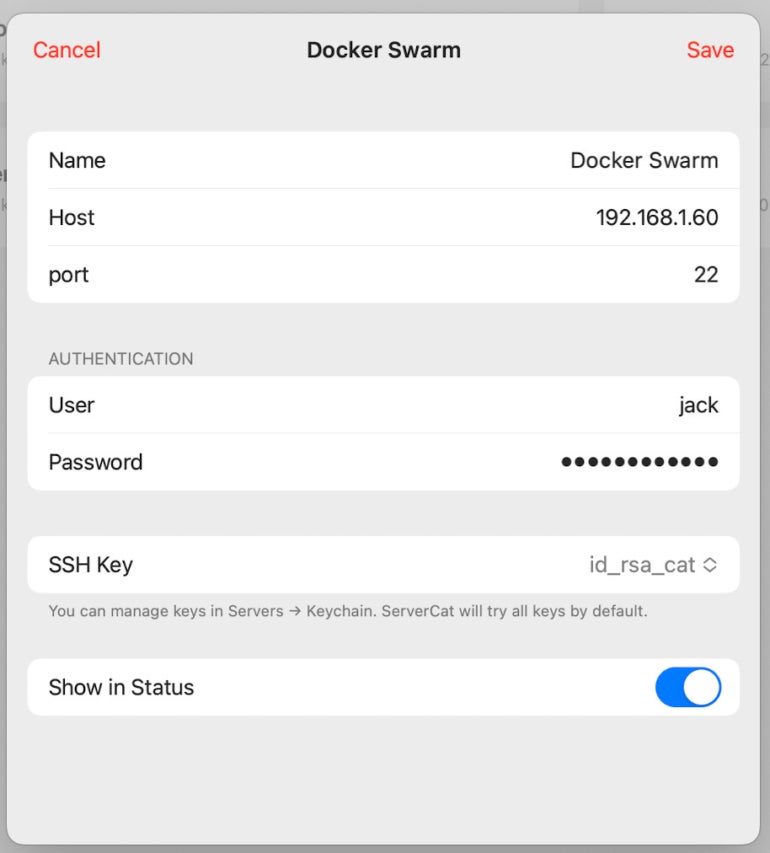
Click + in the top right corner, and in the resulting window (Figure B), fill out the necessary information for your host. Click Save.
Figure B
How to use SSH key authentication
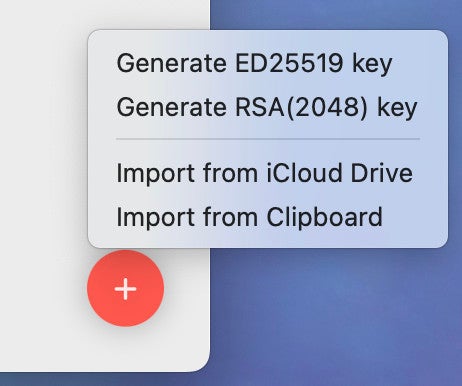
If you want to use SSH key authentication for a more secure connection, you must first click Keychain in the bottom left corner and then click + in the bottom right. From the pop-up menu (Figure C), select Generate RSA key.
Figure C
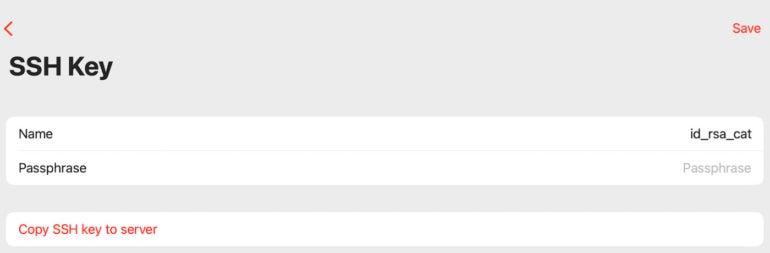
Once you’ve created the key, double-click the entry. In the resulting window (Figure D), click Copy SSH Key To Server.
Figure D
Next, SSH into the destination server, paste the copied command to the terminal and hit Enter on your keyboard. This will add the SSH key to the authorized_keys file so you can now use SSH key authentication.
Before your added host can benefit from SSH Key Authentication, you must make a small edit. Click Hosts and then right-click or two-finger tap the host entry. Select Edit.
In the resulting window, select the SSH key you just created from the SSH drop-down (Figure E).
Figure E
Click Save and your host will now benefit from SSH key authentication.
Easy Linux server monitoring
Keep adding all of your Linux servers and you’ll be able to monitor and manage them from a single, user-friendly application. Next time around, we’ll find out how to deploy a container to a Docker Swarm with ServerCat.
Subscribe to TechRepublic’s How To Make Tech Work on YouTube for all the latest tech advice for business pros from Jack Wallen.
[ad_2]
Source link