[ad_1]
Bug tracking is an important feature for project management, and Orangescrum makes it easy to add it to your workflow.
If your projects center around software development in any way, you know how important it is to keep track of bugs that are discovered. You could opt to make use of yet another tool for the tracking and management of software issues, or you could take advantage of a project management tool that includes bug tracking.
SEE: Hiring kit: Project manager (TechRepublic Premium)
One such tool that includes bug tracking is Orangescrum. The Orangescrum Bug Tracking tool allows team members and stakeholders to submit bugs that include information such as:
- Associated Project and Task
- Issue Type
- Severity
- User
- Reported By
- Bug Detection Phase
- Bug Category
- Client Reported
- Bug Origin
- Resolution
- Bug Owner
- Due Date
- Environment
Submitting a bug also allows you to write a description and add attachments. Before I show you how to submit a bug for a project, there are customizations we should take care of first.
What you’ll need to use the Bug Tracking feature in Orangescrum
To make use of the Bug Tracking feature in Orangescrum, you’ll need a valid account on the cloud version of the platform, as the feature isn’t available on the self-hosted option. However, Bug Tracking is available on the free plan, so you can always test it out before upgrading to a paid plan.
That’s all you need: Let’s track some bugs.
How to configure the Bug Tracking feature
Before you submit that first bug, you’ll want to take care of a small configuration. In particular, you might need to add new Issue Types and Categories into the mix.
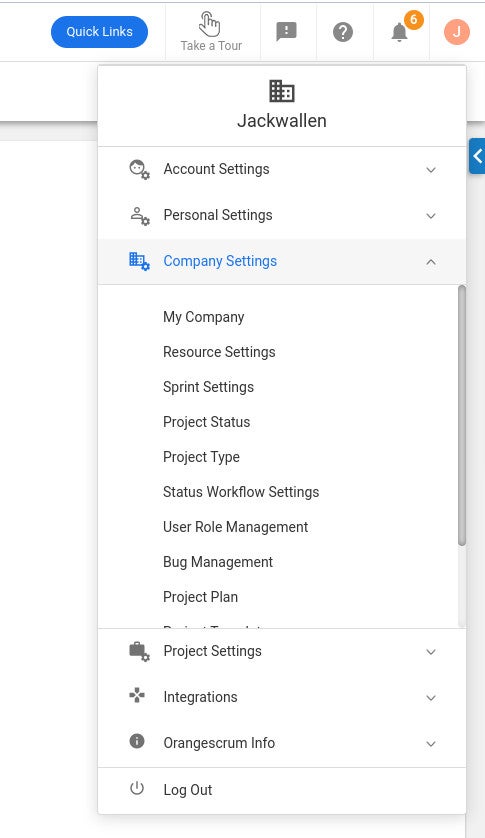
To do that, log in to your Orangescrum account as a user with admin privileges and click the profile icon in the upper right corner. From the resulting menu, click Company Settings | Bug Management (Figure A).
Figure A
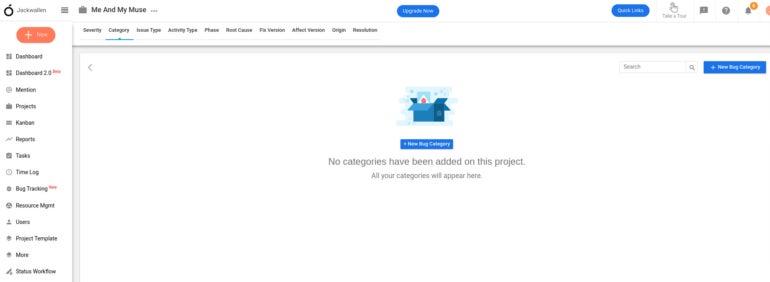
In the new window (Figure B), click the Category tab and then click New Bug Category.
Figure B
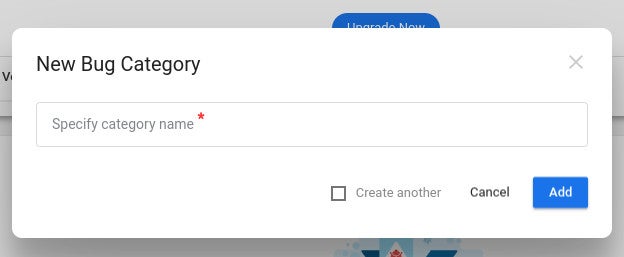
In the pop-up window (Figure C), type the name of your new Bug Category and click Add.
Figure C
Continue creating categories until you’re satisfied. Next, you might want to go through each tab and customize the Bug Management to better match your workflow.
How to submit your first bug
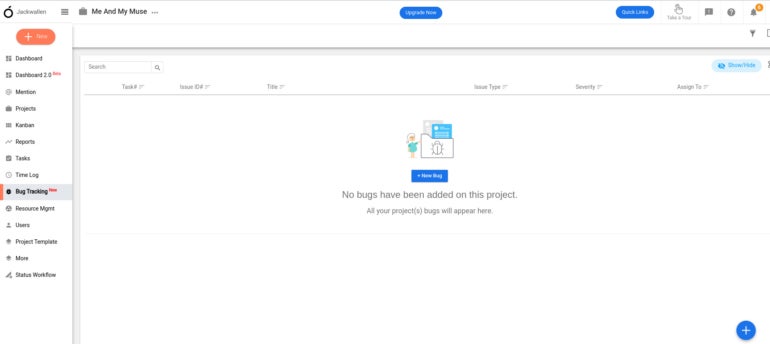
When finished with the configuration, click Bug Tracking in the left navigation. In the resulting window (Figure D), click New Bug.
Figure D
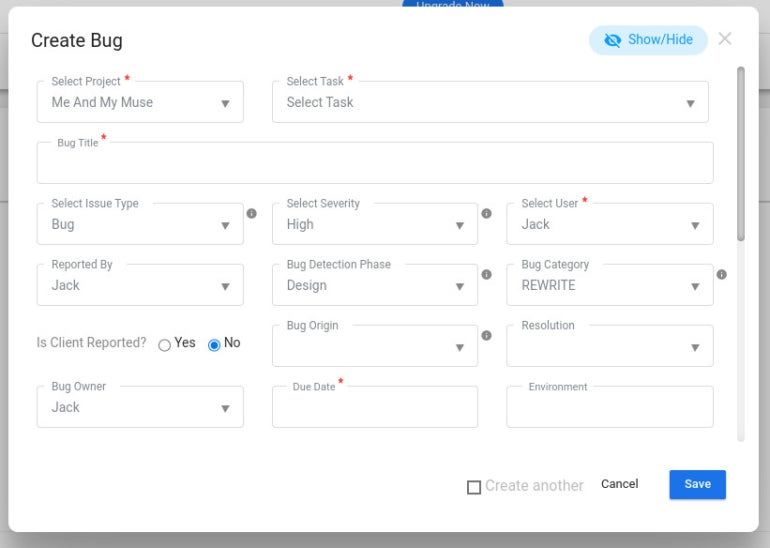
In the resulting pop-up (Figure E), fill out all of the information necessary for the bug and then click Save.
Figure E
Bug tracking made simple
That’s all there is to bug tracking with Orangescrum. The one miss in this feature is the inability to add a bug-tracking widget to the Dashboard. Other than that, the Orangescrum Bug Tracking feature is quite a nice addition to the platform. Give the feature a try and see if you make it your go-to bug-tracking option for your teams.
Subscribe to TechRepublic’s How To Make Tech Work on YouTube for all the latest tech advice for business pros from Jack Wallen.
[ad_2]
Source link