[ad_1]
You can share your Outlook calendar so that other people can just view it or also modify it.

Whether you use the Microsoft Outlook desktop application, Outlook on the web or both, you may want to share your calendar with other people. Perhaps someone else is designated to manage your calendar and needs to be able to view and modify it, or maybe other people want to set up meetings and appointments with you and must know your schedule. It’s possible you maintain multiple calendars and use one of them for shared or group appointments.
Microsoft offers a few different options for sharing your calendar depending on whether other people need to view it or also need to modify and manage it.
What you’ll need to share your calendar
You can share your calendar only with other people in your organization using the same Exchange plan. If you need to share your calendar with someone outside your organization and domain, you would have to publish it so that it’s available for the recipients.
SEE: Google Workspace vs. Microsoft 365: A side-by-side analysis w/checklist (TechRepublic Premium)
How to share your calendar from Outlook client
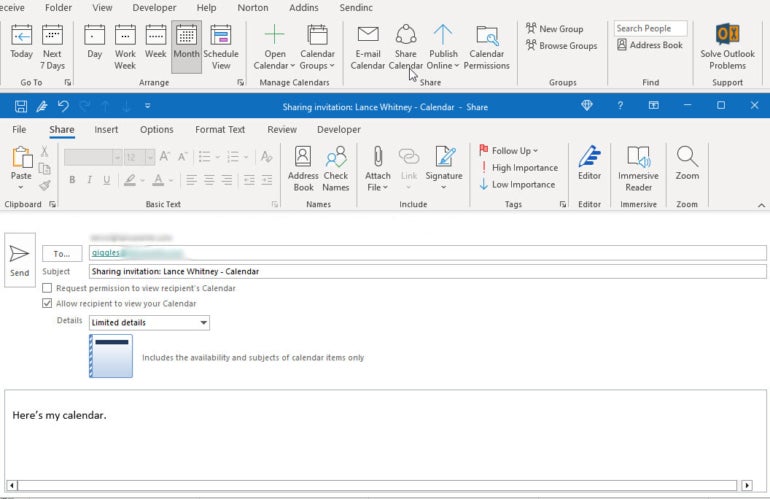
To share your calendar from the Outlook desktop client, click the Calendar icon. In Calendar view, click the Share Calendar icon on the Home ribbon. Add one or more recipients within your organization to the email.
Click the dropdown box for Details and decide whether you want to share your availability only, limited details, or full details. For people who just need to set up meetings with you, sharing your availability only should suffice. For people who need more information about your schedule, you’ll want to share limited or full details. Add a message if you wish.
When ready, send the email (Figure A).
Figure A
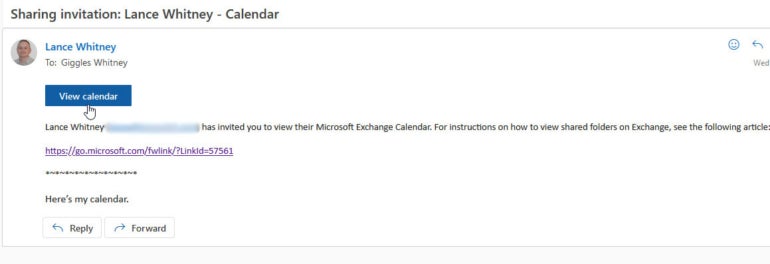
Upon receiving the email, the recipient clicks the Accept button and then clicks the View Calendar button (Figure B).
Figure B
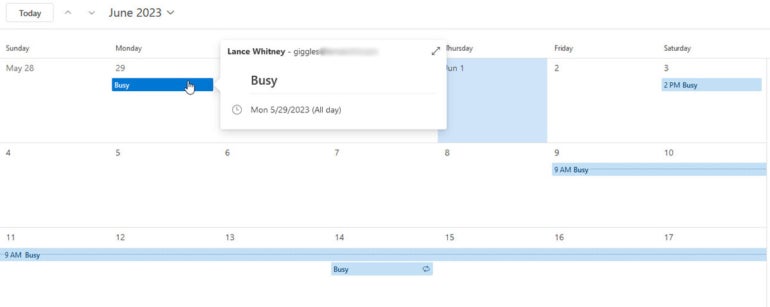
Your calendar and appointments then appear for the recipient to view. If you chose to share your availability only, the calendar will appear with the word Busy to highlight the dates and times on which you already have an appointment. Clicking a specific event displays the times but still shows only that you’re busy (Figure C).
Figure C
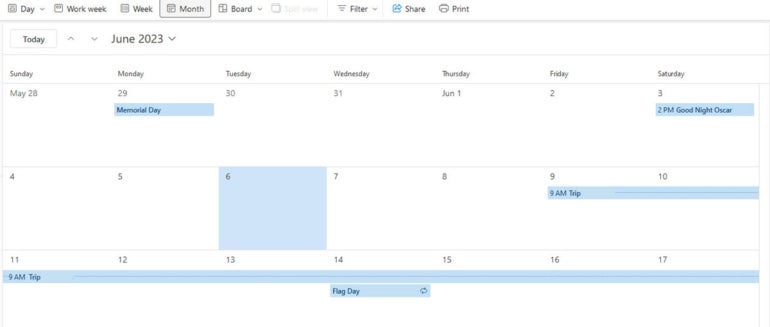
If you shared limited details, the calendar will show the time, subject and location but no other information. Full details will show the time, subject, location and all other details (Figure D).
Figure D
How to customize your calendar sharing settings
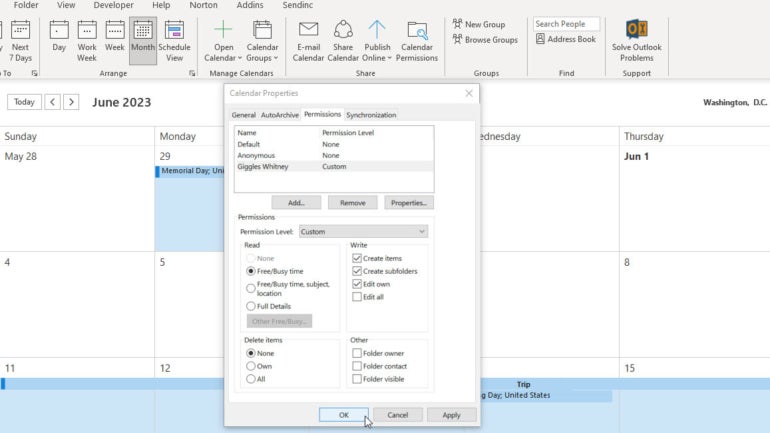
To customize your sharing settings, click the Calendar Permissions button at the top. At the Calendar Properties window, you can change the permission for Default and Anonymous.
You might prefer to add specific users and then customize their permissions. For example, you could add a user and then grant that person the ability to create items and add subfolders. When done, click OK (Figure E).
Figure E
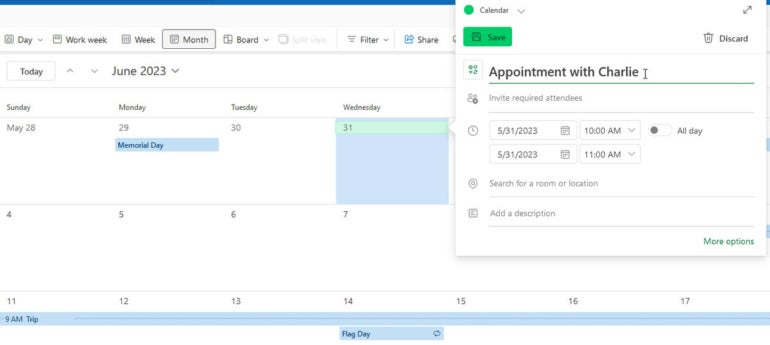
You can then share your calendar with any recipient for whom you created special permissions, and that person will be able to view and possibly edit or add events to your calendar based on your settings (Figure F).
Figure F
How to share your calendar from the Outlook website
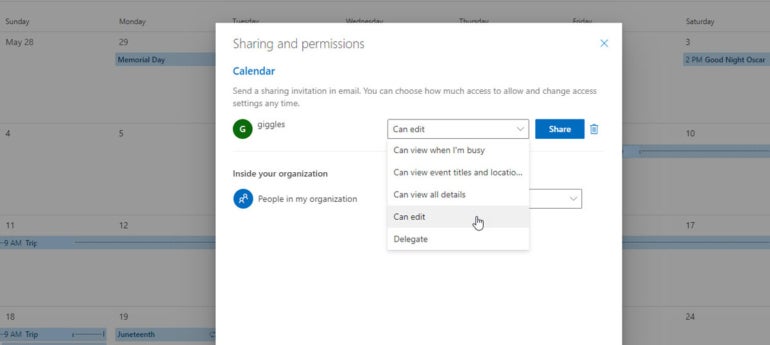
To share your calendar from the Outlook website, click the Calendar icon. In the Calendar view, click the Share icon on the top toolbar. At the Share window, start typing the name of the internal person with whom you want to share your calendar and then select that person. Click the dropdown menu and choose the permission you wish to assign to this person for your calendar — Can View When I’m Busy, Can View Event Titles And Location Of An Event, Can View All Details, Can Edit or Can Delegate.
You can also change the default permission for all people in your organization. Click the dropdown menu for that entry and set the permission you want to assign — Not Shared, Can View When I’m Busy, Can View Event Titles And Locations, Can View All Details or Can Edit.
When done, click the Share button (Figure G).
Figure G
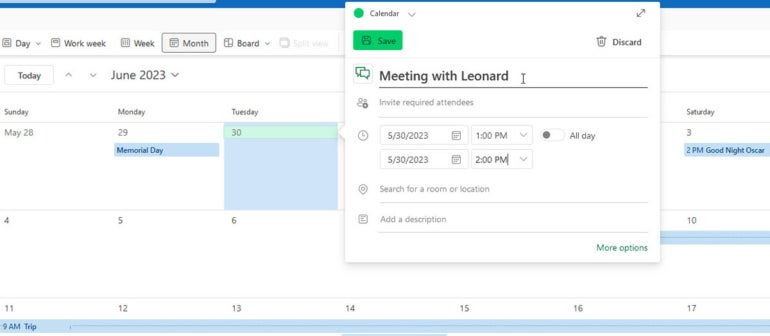
The recipient or recipients can then view and possibly modify your calendar depending on the permissions you granted (Figure H).
Figure H
[ad_2]
Source link