[ad_1]

You’ve been snapping photos on your iPhone or iPad for work and now want to edit them. You can do that directly in the Photos app, which offers a range of editing tools and features.
SEE: iCloud vs. OneDrive: Which is best for Mac, iPad and iPhone users? (free PDF) (TechRepublic)
With the app, you can adjust the brightness, exposure, contrast and other attributes. You’re able to apply different filters, and you can crop, rotate and straighten the image. Let’s see how this works.
How to edit your photos with your mobile Apple device
Launch the Photos app on your device and open the image you wish to edit. Tap the Edit command in the upper right of the screen. The first control at the bottom of the screen lets you change the visual look of the image.
To work with the app to tweak your photo, tap the Auto Enhance icon. This option adjusts all the attributes in one shot, including exposure, brilliance and highlights. Move the slider right and left to adjust the overall look of the photo (Figure A).
Figure A
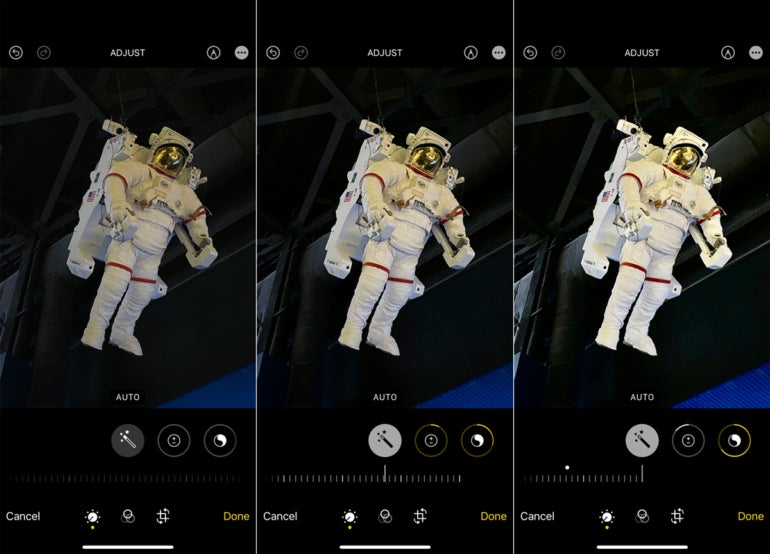
If you don’t like the changes made by Auto Enhance, tap the Undo icon at the top of the screen to remove them (Figure B).
Figure B

If you’d prefer to adjust each attribute one at a time, tap the Auto Enhance icon again to turn it off. Go to each of the other controls — exposure, brilliance, highlights, shadows, contrast, brightness, black point, saturation, vibrance, warmth, tint, sharpness, definition, noise reduction and vignette.
For each one, move the slider to the right and left until you’ve changed the look of the photo to your satisfaction (Figure C).
Figure C

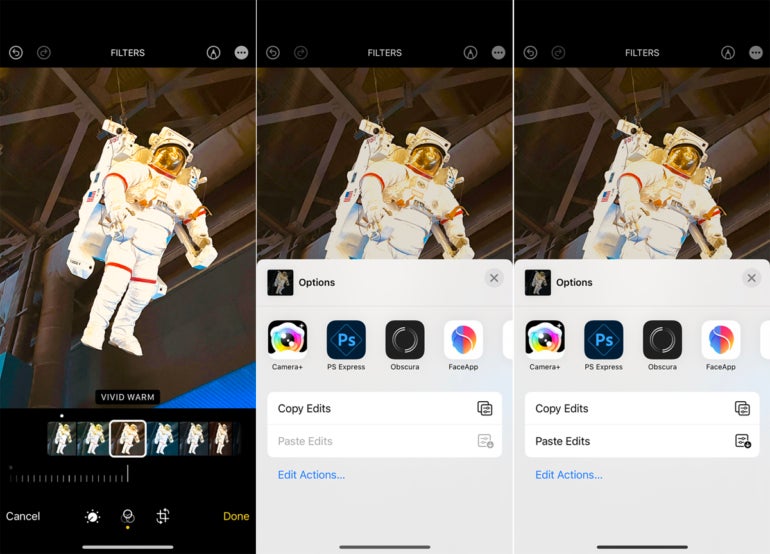
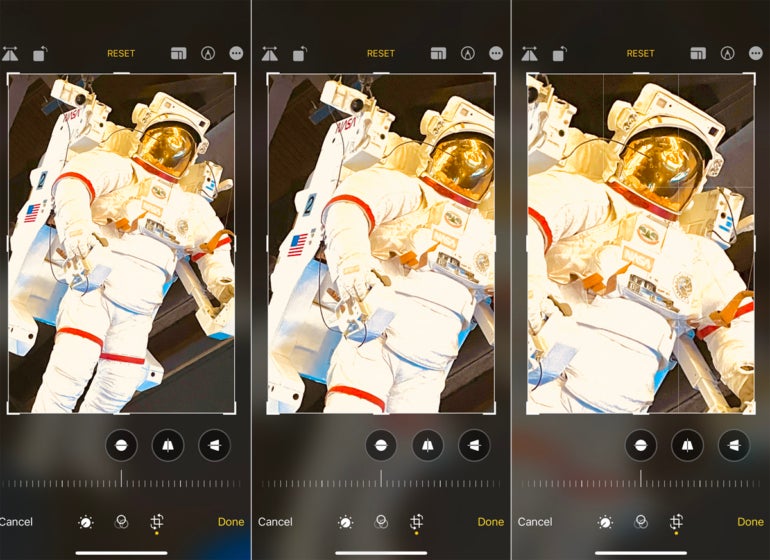
After adjusting the overall look of the photo, you can apply different color filters. Tap the Filter icon at the bottom of the screen and then swipe through the different filters — Original, Vivid, Vivid Warm, Vivid Cool, Dramatic, Dramatic Warm, Dramatic Cool, Mono, Silvertone and Noir.
For each filter, move the slider left and right to change the effect of the filter photo (Figure D).
Figure D

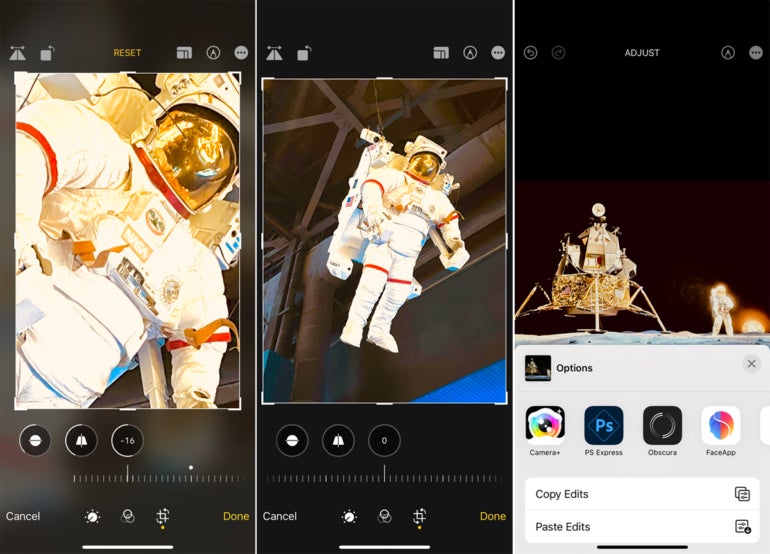
At this point, if you like the changes you’ve made and want to apply them to other photos, tap the three-dot icon at the top and select Copy Edits. After you’ve finished modifying your current photo and have saved it, you can apply the visual edits to another image (Figure E).
Figure E
Next, tap the third icon at the bottom. To flip the photo horizontally, tap the first icon at the top. To rotate the photo, tap the second icon at the top. Keep tapping to continue rotating the image (Figure F).
Figure F
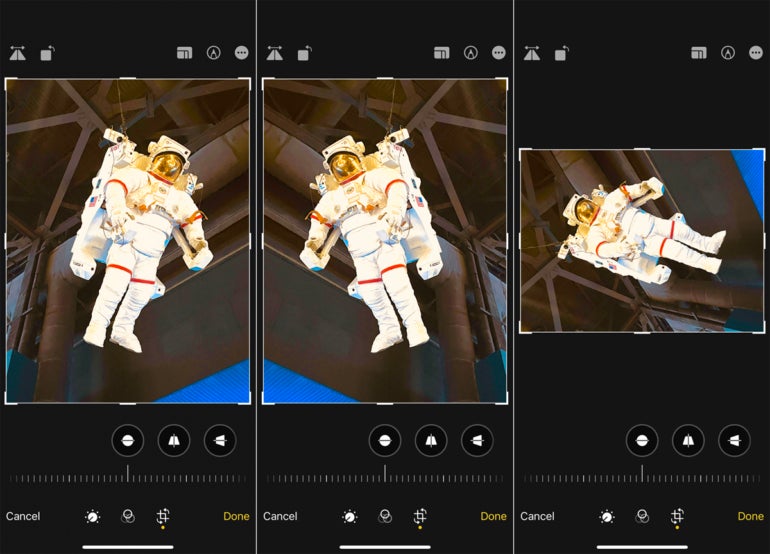
To change the overall aspect ratio of the photo, tap the third icon at the top in the upper right. You can then tap one of the ratios at the bottom — Original, Freeform, Square or Wallpaper (Figure G).
Figure G

Next, the numerical aspect ratios can be applied to your photo in portrait or landscape mode. Tap one of these numerical ratios and then tap either the portrait icon or the landscape icon.
The following ratios are available: 9:16 or 16:9, 4:5 or 5:4, 5:7 or 7:5, 3:4 or 4:3, 3:5 or 5:3, and 2:3 or 3:2. To exit the aspect ratio mode, tap the same icon at the top of the screen (Figure H).
Figure H
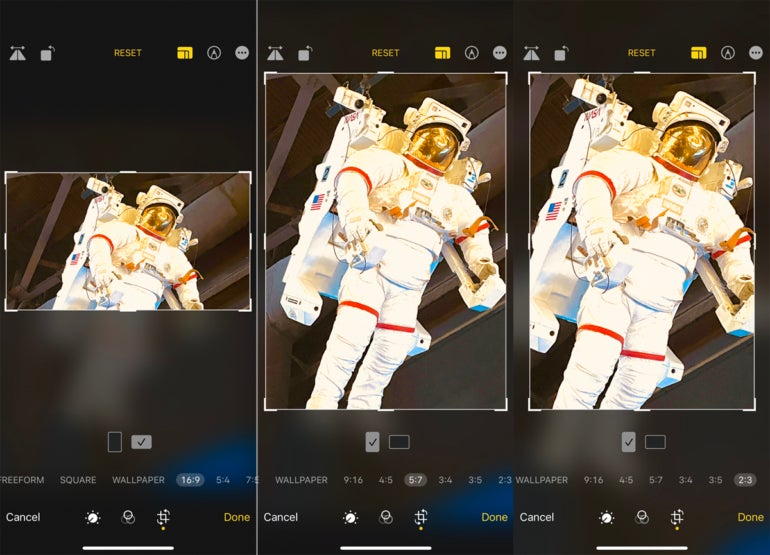
In any mode, you can crop the photo by dragging the handles on any side or corner (Figure I).
Figure I
To manually tilt the photo, tap the Straighten icon at the bottom. Move the slider to tilt the photo left or right. To extend the photo at the top or bottom, tap the second icon at the bottom and then move the slider left or right. To extend the photo to the left or right, tap the third icon at the bottom and then move the slider (Figure J).
Figure J

At any point, you can discard the cropping and rotating changes you’ve made by tapping the Reset command at the top. When finished, tap Done in the lower right corner to save the photo with all your changes and exit Edit mode, or tap Cancel to discard all your changes and then exit.
To apply the edits from this image, open another photo. Tap the three-dot icon at the top and select Paste Edits (Figure K).
Figure K
For more tutorials for the iPhone and iPad, check out these two articles: How to use Spotlight to search for files, images and more, and How to use Live Captions in audio and video conversations.
[ad_2]
Source link