[ad_1]
Taking a few moments now to tweak the macOS Ventura Control Center can save you time every time you use your Mac.
If you’re using a Mac for business, odds are you use the computer every workday. Tweaking the macOS 13 Ventura Control Center to match your personal preferences pays off because you will save time and reduce the number of menu selections and clicks needed to access and configure frequently adjusted settings. The only trick is to remember to adjust the Control Center settings and the Mac’s menu bar to provide quick access to the features you use most often.
How to access the macOS Control Center feature
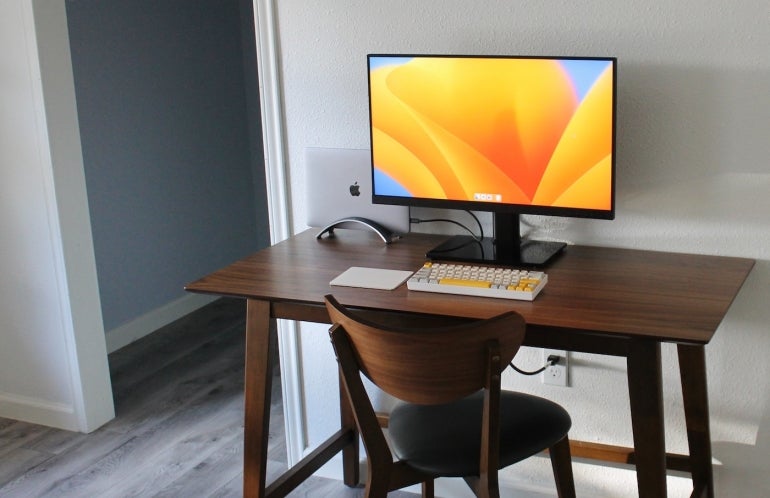
There are a couple of methods for accessing the Mac Control Center. You can either click the Control Center icon from the Mac’s menu bar (Figure A), or open System Settings by clicking the Apple logo and selecting the System Settings option.
Figure A

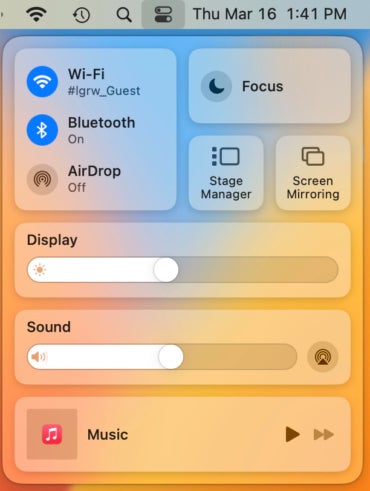
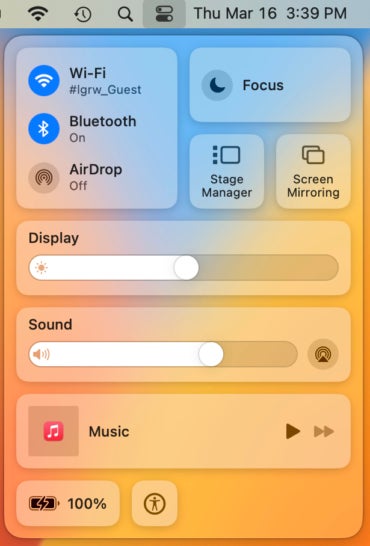
Clicking the Control Center icon on the Mac menu bar opens the feature’s menu (Figure B).
Figure B
Alternatively, you can access the macOS Control Center from the System Settings menu. Simply click the Apple icon on the menu bar, select System Settings, scroll down within the left-hand pane and click Control Center.
How to configure the macOS Control Center feature’s settings
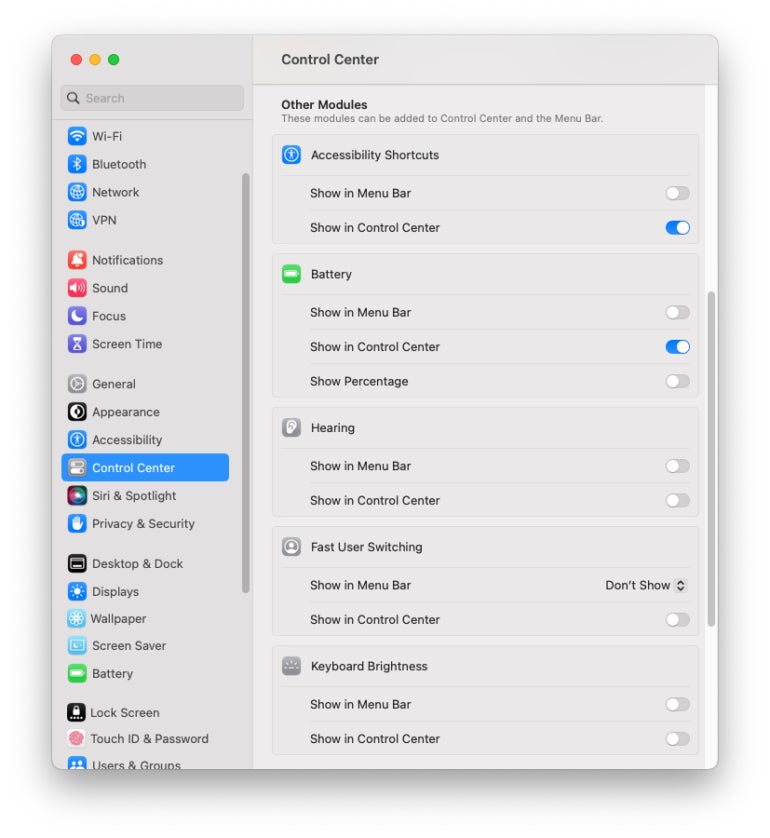
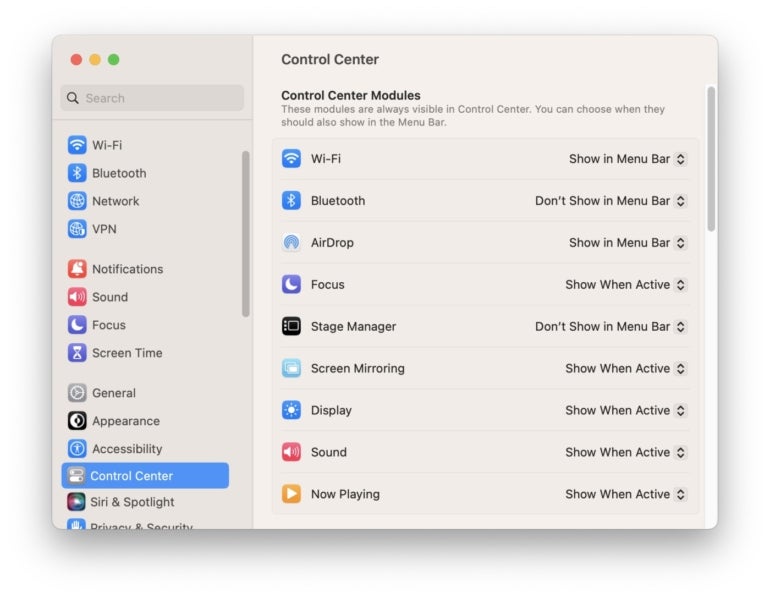
You can configure the Control Center’s settings and then adjust several individual items that appear when clicking the corresponding icon in the Mac’s menu bar by using the provided settings (Figure C).
Figure C
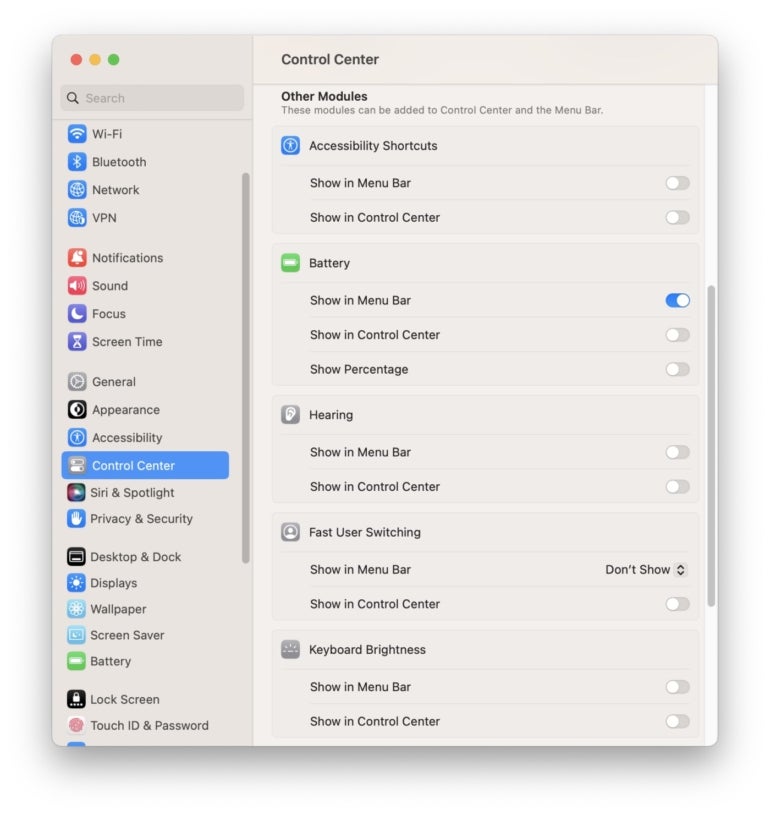
To add and remove selections that appear within the Control Center when clicking its icon from the Mac menu bar, adjust respective modules accordingly. For example, to view Accessibility Shortcuts and Battery information, enable the corresponding radio buttons (Figure D).
Figure D
When you select Control Center from the Mac menu bar, these options will appear in the next menu (Figure E).
Figure E
Among the elements that can be added or removed to the Control Center are:
- Accessibility Shortcuts
- Battery information
- Hearing controls
- Fast User Switching
- Keyboard Brightness
Other modules are permanent fixtures of the Control Center, including:
- AirDrop
- Bluetooth
- Display
- Sound
- Stage Manager
- Wi-Fi
However, using the same Control Center menu accessed from System Settings, you can choose to add or remove those items individually from the Mac menu bar (Figure F).
Figure F
For example, to remove the Wi-Fi icon from the menu bar, you can select Don’t Show in Menu Bar for that item using the corresponding dropdown menu. The option provides several frequently accessed elements, including Screen Mirroring and Now Playing.
Read next: Top project management software for Mac users in 2023 (TechRepublic)
[ad_2]
Source link