[ad_1]
Instead of diving headfirst into creating that first project in Orangescrum, you could pave a more successful path with the help of a Project Plan.

When you first start piecing together a project, you have meetings. You discuss everything about the project with those stakeholders who will be responsible for making it happen and those who have the knowledge and information to ensure the project will be a success. You spend hours in those meetings, you send emails back and forth, you have phone calls and chats with numerous people.
SEE: Hiring kit: Project manager (TechRepublic Premium)
Once those things are taken care of, you turn to your project management solution and start adding tasks. The kanban boards, Gantt charts, Timelines, Calendars and anything else you’ve created might help you, or they might get in your way. If you haven’t carefully planned the layout and features of your project management tool as well as you’ve planned the project, why even bother using the tool?
You should give the management of the project as much thought as you have the creation of the project, and Orangescrum includes a feature that will help you do just that.
What is an Orangescrum Project Plan?
Orangescrum Project Plan not only makes it easier for you to plan out the path for project management, but it also makes it possible for you to use it as a template for later projects. If what you’ve created is a success, you might have an even better chance of recreating that success the next time around.
Think of the Project Plan as your blueprint that will help to guide your project from concept to delivery. Project Plans help with:
- Better resource allocation
- Better effort estimation
- Defining task relationships
- Key objectives and milestone clarity
- Risk identification
A Project Plan will also help to reinforce best practices, standardized processes, prevent omissions, and increase team collaboration and productivity.
When you create a project plan, you create task groups, add tasks and subtasks, classify tasks with task types and task labels, and assign resources to tasks. Once you have a Project Plan created, you can then create as many Projects from the Plan as needed.
Let me show you how to create a Project Plan with Orangescrum.
What you’ll need to create a Project Plan in Orangescrum
To create a Project Plan, you must have an Orangescrum Cloud account, as this feature is not available for the self-hosted community edition. You can use the free or paid plan, as the feature is available to both. With your Orangescrum account at the ready, let’s plan.
How to create your first project plan
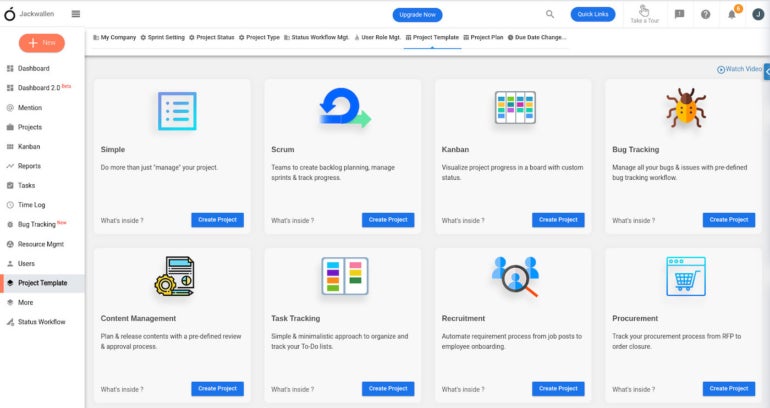
Log in to your Orangescrum account and click Project Template in the left navigation. In the resulting window (Figure A), click the Project Plan tab at the top.
Figure A
In the Project Plan section, click + at the bottom right corner to create your first Project Plan. You will be prompted to name your new Project plan, so give it a name and click Create (Figure B).
Figure B

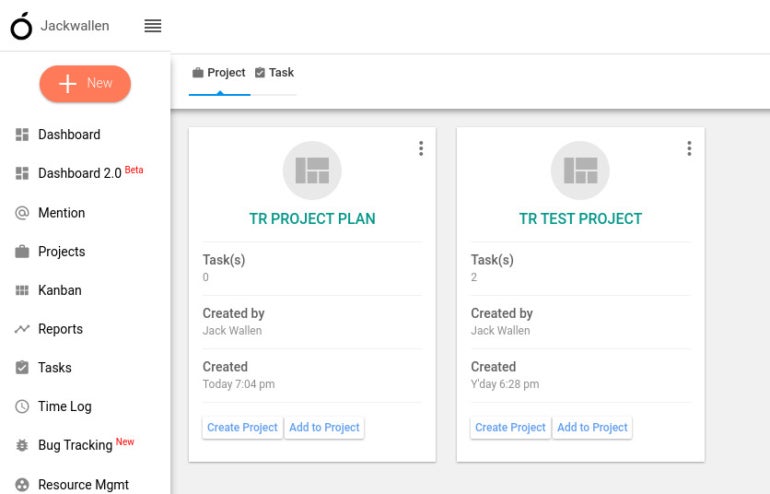
Once the plan is created, you’ll see a card dedicated to it in the Project Plan window (Figure C).
Figure C
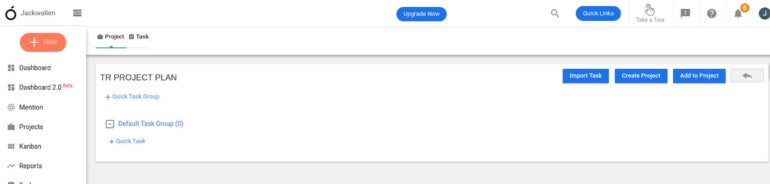
Click the three-dot menu button in the upper right corner of the plan and select Manage Task. In the resulting window (Figure D), you can start adding Task Groups and tasks as needed.
Figure D
Once you’ve added all the task groups and tasks to the Project Plan to your liking, click the left-pointing arrow in the upper right corner to go back to the Project Plan page.
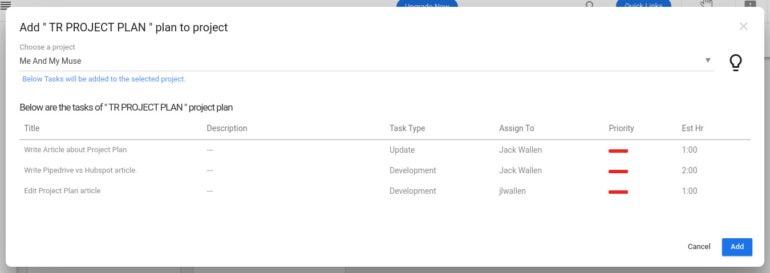
At this point, you could even add an existing project to the plan. To do that, click Add to Project, and then, in the resulting window (Figure E), select the project you want to add and click Add.
Figure E
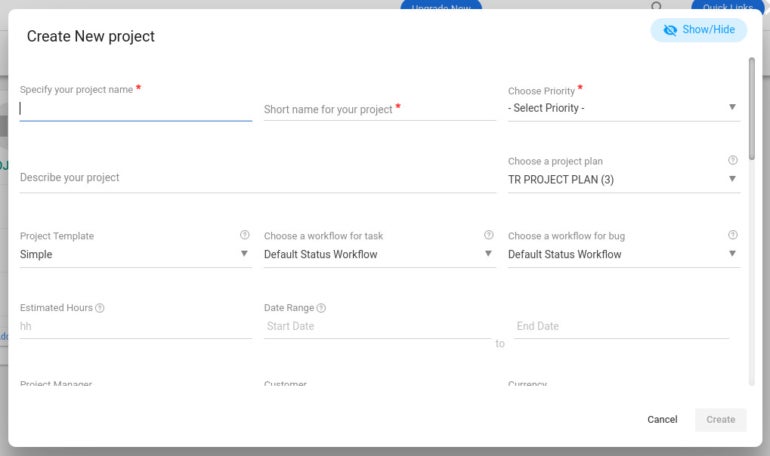
When you’re satisfied with your Plan, you can create a project from it by clicking Create Project. In the new pop-up (Figure F), fill out the details for the project and click Create.
Figure F
Easy project templates
There you have it — the means to create Orangescrum project templates with the help of Project Plans. This is a great way to create project templates that can be reused as often as you need. Take the time to create a well-thought-out plan and your project management efforts will be considerably better for the effort.
Subscribe to TechRepublic’s How To Make Tech Work on YouTube for all the latest tech advice for business pros from Jack Wallen.
[ad_2]
Source link