[ad_1]
GitHub Issues allow you to track your development work and define tasks that must be completed. Find out exactly what they are and how to use them.

GitHub is the most widely-used service to provide the git distributed version control system on the market. Not only does GitHub give you access to git and hosted repositories, but it also includes access control, software feature requests, task management, continuous integration, wikis and bug tracking.
What are GitHub Issues?
One feature that you should start using as soon as possible is GitHub Issues, which allows you to create issues from a repository as well as a task list item, project note, comment, specific line of code or URL query. Issues can be created via the web UI, the GitHub Desktop application, the command line and other sources.
With GitHub Issues, you can:
- Create Issues.
- Track work.
- Stay up-to-date.
- Manage a project.
- Communicate.
- Compare and discuss issues.
Every GitHub Issue has a creator and assignees, and it’s prioritized using the GitHub Project Board. GitHub Issues is free to use with no limitations.
Don’t mistake GitHub Issues as a bug-tracking tool. Instead, think of it as a general tracking tool for each project, where you can keep up with progress, collaboration, tasks, feature requests and more. GitHub Issues allow you to keep your work and plans in sync. Every GitHub repository has an associated Issues tool.
If you go to your GitHub main page, you’ll notice an Issues tab at the top (Figure A).
Figure A

If you click the Issues tab, you’ll get a list of all issues for every project. From that overview, you can click to view an issue and interact with it, but you can’t create an issue. Let’s find out how to create one.
What you’ll need
The only things you’ll need for this are a valid GitHub account and at least one repository. That’s it: Let’s create.
SEE: Hiring kit: Back-end Developer (TechRepublic Premium)
How to create an issue with GitHub Issues
The first thing you must do is log in to your GitHub account.
Once you’ve done that, navigate to a repository. You’ll see the Issues tab (Figure B).
Figure B

Click on the Issues tab and then click New Issue (Figure C).
Figure C

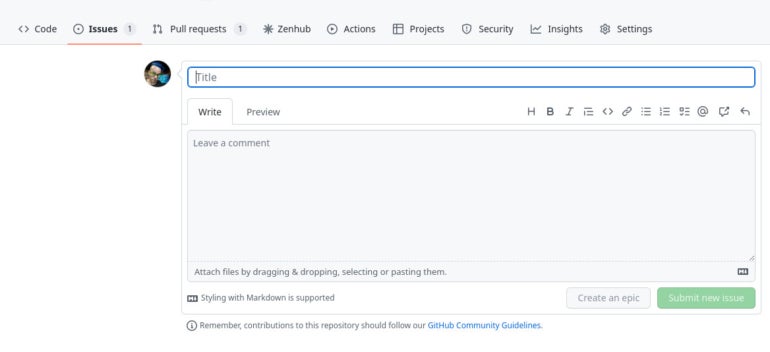
In the resulting window (Figure D), give the Issue a title and then type the body in the Write tab.
Figure D
The Issue editor accepts markdown, or you can format text in the body from the toolbar. When formatting from the toolbar, it simply adds the markdown to the text (Figure E).
Figure E
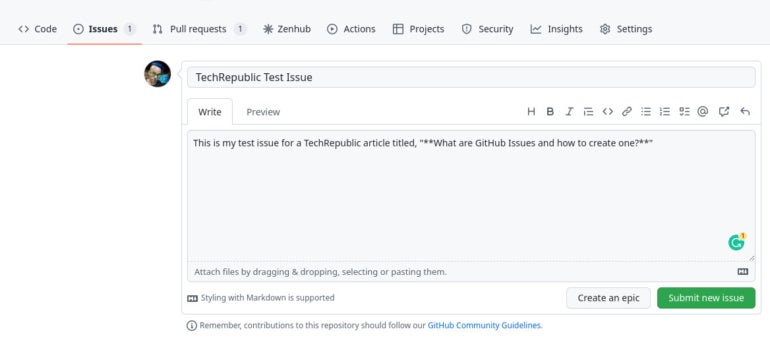
Once you’ve finished writing the Issue, click Submit New Issue to save your work.
A few notes on creating your item:
- To directly mention a team member, click the @ symbol in the formatting toolbar.
- To reference another Issue, pull request or discussion, click the chat symbol with an upward right-pointing arrow.
- To add a saved reply, click the left-pointing arrow in the formatting toolbar.
- Assigning an Issue is done once the Issue is created.
How to assign an Issue
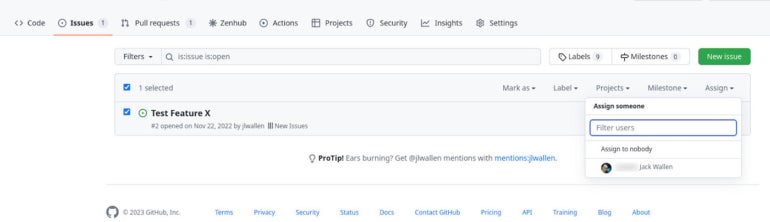
Assigning an Issue cannot be done in the creation window. Instead, go back to the main Issue tab from your GitHub Dashboard. Next, select the checkbox associated with the Issue you want to assign and then select the Assign drop-down. Select the team member you wish to assign (Figure F).
Figure F
Once you’ve assigned an Issue, the assignee’s profile photo will appear in the listing.
As you work through an Issue, you can close the Issue either as completed or not planned. The as-completed finish means the Issue is closed, fixed or resolved. The Close As Not Planned option is used when an Issue cannot be fixed, reproduced, duplicated or has gone stale.
Start working with Issues now
If GitHub is your developer repository or version control platform of choice, you owe it to yourself to start making use of Issues. Not only can you keep better track of problems, but you can also keep better track of how your project is progressing so every stakeholder involved stays in the loop.
GitHub Issues should be considered a must-use tool. Start using Issues now to help improve your GitHub workflow.
Subscribe to TechRepublic’s How To Make Tech Work on YouTube for all the latest tech advice for business pros from Jack Wallen.
[ad_2]
Source link