[ad_1]
When your team pulls more Docker images than an anonymous connection will allow, you need to add an authenticated Docker Hub registry to Portainer.

As an individual who works with Portainer on very small efforts, I never have to worry about the limits placed on the anonymous pulls. As it stands, you are allowed 100 pulls per six hours per IP address for anonymous users. For authenticated users, you get 200 pulls per six-hour period.
That difference may not sound like much, but when you’re working in an enterprise environment, that extra 100 pulls can mean the difference between getting your containers deployed or having to wait nearly a full business day to resume work. You don’t want that.
SEE: Hiring kit: Back-end Developer (TechRepublic Premium)
If you have a Docker Hub account, why not apply it to Portainer so you can double the number of pulls you get in that six-hour window of time? This is as clear-cut as it gets, and fortunately, Portainer has made it easy to add an authenticated Docker Hub account. Let me show you how it’s done.
What you’ll need to add an authenticated Docker registry to Portainer
In order to succeed with this addition, you’ll need a running instance of Portainer and a valid Docker Hub account. You’ll also need a valid admin user account for Portainer.
With those things at the ready, let’s add an authenticated Docker Hub registry to Portainer.
How to add an authenticated Docker Hub registry
The first thing you must do is log in to your Docker Hub account and create an access token, because you can’t simply use your username/password credentials. To do this, log in to Docker Hub, click on your user profile icon in the top right, and select Account Settings.
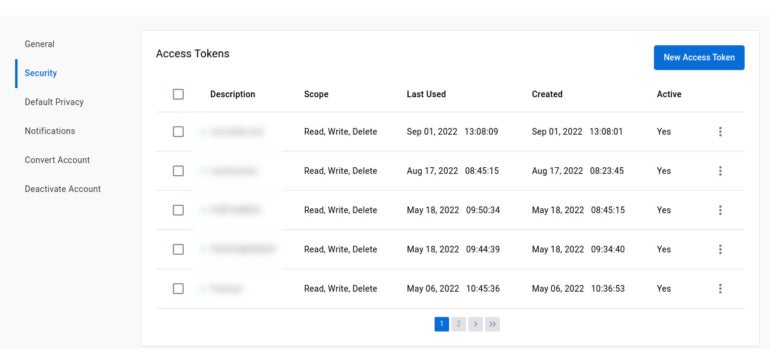
In the Account Settings window, click Security, and then, in the resulting window (Figure A), click New Access Token.
Figure A
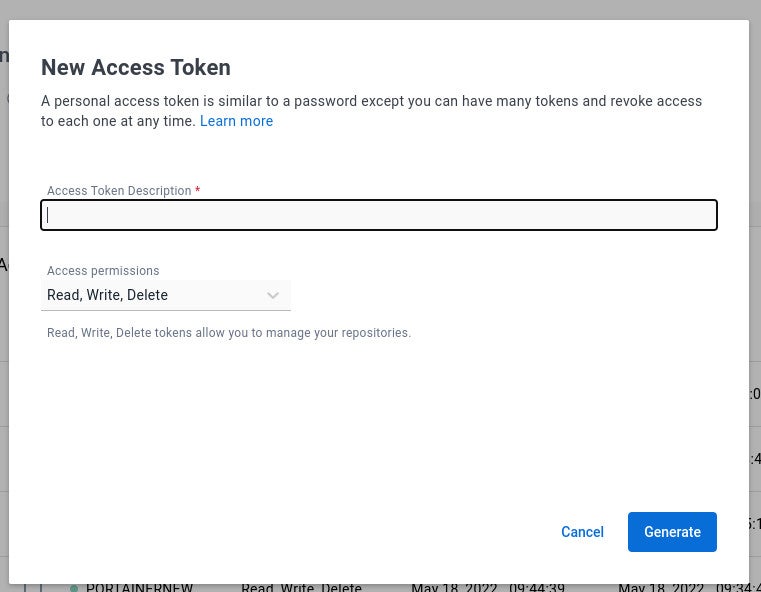
In the New Access Token pop-up (Figure B), give the token a name, select Read, Write, Delete from the Access Permissions drop-down and click Generate.
Figure B
You will be presented with your access token. Copy that token, because this is your only chance to view it. With your access token at the ready, head back to Portainer and click Registries under Settings in the left navigation.
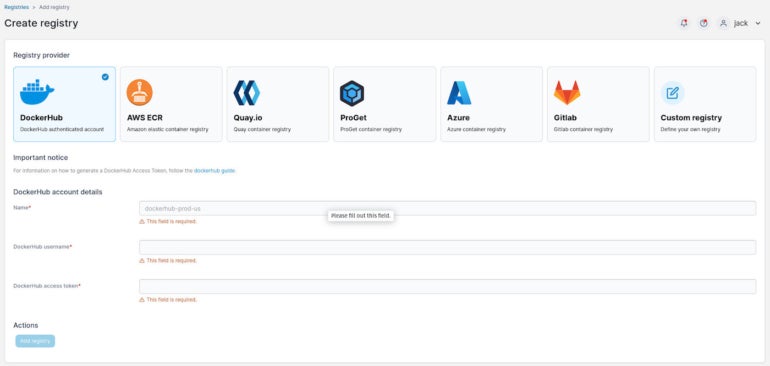
In the resulting window, click Add Registry near the top right. In the Create Registry window (Figure C), select Docker Hub, give the registry a name, type your Docker Hub username and then paste the access token in the Docker Hub Access Token field.
Figure C
Click Add Registry and the information is saved. You’ll be taken back to the registry listing, where you’ll see the new authenticated Docker Hub registry (Figure D).
Figure D

How to use the authenticated registry
When you go to deploy a new application, you should see the new authenticated registry available in the Registry drop-down (Figure E).
Figure E

A more robust workflow
With the authenticated Docker Hub registry in place, you’ll find Portainer offers a much more robust workflow. Your developers can pull more images, so there won’t be any bottlenecks in the process.
Subscribe to TechRepublic’s How To Make Tech Work on YouTube for all the latest tech advice for business pros from Jack Wallen.
[ad_2]
Source link